Tag Archives: cheddar cheese

Bacon and Cheese Tart

9 bacon slices
½ cup all-purpose flour
½ cup whole wheat flour
¼ cup vegetable oil, plus more for the pan
5 eggs
¼ cup sour cream
1½ cups grated cheddar cheese
Special equipment: A 9-inch tart pan with a removable bottom

  1. Heat oven to 425 degrees. Line a baking sheet with foil. Place the bacon slices on the foil (make sure none are overlapping). Bake for 12 minutes. Drain the grease, then return the bacon to the oven for 5-8 minutes more (how long depends on the thickness of the bacon and how crispy you want it to be). Drain the grease again when done cooking. When the bacon has cooled a bit, crumble it into a small bowl. 
  2. Reduce oven heat to 375 degrees. Use a little vegetable oil to lightly grease the tart pan. 
  3. In a medium-sized bowl, combine the flours. Add the vegetable oil a little at a time, stirring after each addition. Once you’ve added all of the vegetable oil, stir in water 1 tablespoon at a time until everything sticks together. Shape the dough into a ball and place it in the prepared tart pan. Flatten and shape the dough to fill the tart pan.
  4. In a large bowl, whisk together the eggs and sour cream. Stir in the crumbled bacon and grated cheese. Pour this mixture into the prepared tart crust.
  5. Bake the tart for 30 minutes or until set. 

Arugula, Cheddar, and Tomato Panzanella Salad


Adapted from The Vegetarian Times

4 cups bread cubes (from a baguette or similar crusty bread)
7 tablespoons olive oil
3 garlic cloves, finely minced
1 tablespoon lemon juice
5 ounces arugula
8 ounces sharp white cheddar cheese, cubed
Sundried tomatoes

  1. Heat oven to 400 degrees. Toss the bread pieces in a large bowl with 5 tablespoons olive oil. Spread in one layer on a baking sheet. Bake for 10 minutes or until golden.
  2. In a small bowl, combine the garlic, remaining olive oil, and lemon juice.
  3. In a large bowl, combine the arugula, cheddar cubes, and sundried tomatoes. Pour the dressing over the salad, tossing to coat.

Apple-Bacon-Cheddar Flatbreads

If you’re going to indulge in a winter meal, you might as well go all out. I streamlined this recipe down to its basics so you can focus on what matters most: the mingling of bacon and cheese, and apples that go excellently with both.

Apple-Bacon-Cheddar Flatbreads
Adapted from Bon Appetit

1 package bacon
6 pita or naan rounds
8 ounces white cheddar, grated
2 pink lady apples, peeled and diced
1 tablespoon chopped fresh sage

  1. Heat oven to 425 degrees. Line a baking sheet with foil. Place the bacon slices on the foil (make sure none are overlapping). Bake for 12 minutes. Drain the grease, then return the bacon to the oven for 5-8 minutes more (how long depends on the thickness of the bacon and how crispy you want it to be). Drain the grease again when done cooking. When the bacon has cooled a bit, crumble it into a small bowl.
  2. Lower the oven heat to 400 degrees. Evenly distribute the grated cheese over the pita or naan rounds. Top each with apples and a sprinkling of sage. Finish by sprinkling each with crumbled bacon.
  3. Place the flatbreads on baking sheets and bake for 6 minutes, rotating the pans halfway through.

Then and Now, the Best Tortilla Soup

In high school, I had a bit of an obsession with tortilla soup. It was a very focused obsession: one tortilla soup, one restaurant (which is kind of a feat considering the place I grew up, a small island near Seattle, has three Mexican restaurants). This tortilla soup, at Casa Rojas, with its chicken, strings of melted cheese, avocado slices, and flavorful broth, had me in its grasp for a while.
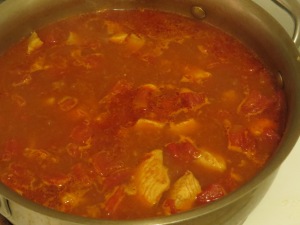
img_3031But then I moved out and went to college, graduated, moved back home, then out again to Seattle, and tortilla soup never came up. The last time I went to Casa Rojas, which was something like five years ago, my friends and I got burritos that were inexplicably filled with peas. I probably don’t have to tell you that peas did not go down well in these burritos. It occurs to me now that, even though it was a hot summer day, I should have ordered the tortilla soup. But like I said, it had fallen off the radar.
img_3049And then, when tortilla soup was as far from my mind as it could be, it returned to my life. As I flipped through one of my notebooks of recipes clipped from here and there, I saw one for tortilla soup. Suddenly, the memory for the soup flooded back, followed by the craving to have it as soon as I could. But I didn’t want to get on the ferry and go to Casa Rojas; goodness knows they’ve started putting peas in the soup, too. Instead, I wanted to make it myself. I know it’s a gamble to try to replicate a favorite restaurant dish in a home kitchen, especially when you haven’t had it in many years, allowing plenty of time for its deliciousness to build up in your memory.

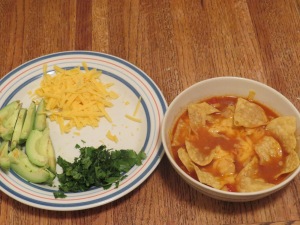
img_3059Obviously, that didn’t stop me, and what I ended up with is, I think, even better than what I started with. I could easily replicate everything I loved about the restaurant’s soup. And this is one of the easiest soups I have ever made. There’s really nothing stopping me from making this as often as I please, and especially now, with winter’s end still a ways off, it’s absolutely necessary. I made only a few slight changes to the recipe, including keeping the tortilla chips whole instead of crushing them. I like the whole chips poking out of the broth and soaking it up, delicious even when they’re a little soggy. Somehow, that still works.

One reason I think this soup tastes even better to me than the version from the past is that I’m in a better, happier place. Life’s just more fun now, and after all, those past times are only going to get further away. Best to find new ways to enjoy the present.

Tortilla Soup
Adapted from Cooking Light

A little olive oil
2 garlic cloves, minced
3 cups chicken broth
About 1 ½ pounds chicken breast, cut into 1-inch strips
1 cup water
1 tablespoon chili powder
1 tablespoon ground cumin
1 14-ounce can diced tomatoes (do not drain)
Tortilla chips
Grated cheddar cheese, for garnish
Chopped cilantro, for garnish
Avocado wedges, for garnish

  1. Heat a little olive oil in a large saucepan or pot over medium-high heat. Add garlic and sauté for 1 minute. Add the broth, chicken pieces, water, chili powder, cumin, and diced tomatoes with their liquid. Bring to a boil, then reduce heat to medium and let simmer 15 minutes.
  2. Ladle the soup into bowls (make sure to leave room for all the garnishes!). Place a large handful of tortilla chips in the soup (adjust the amount to fit your preference and the size of the bowls). Garnish with cheese, chopped cilantro, and avocado wedges.

Inspiration Everywhere: Cheesy Scones

I usually find recipe inspiration in cookbooks and magazines—not that I shun the internet (there’s plenty of good stuff there too) but because  I’m constantly looking through and referencing my vast collection of the printed word. This recipe started with an internet inspiration, but ultimately the winning recipe was in a cookbook.

img_2568It all began when a friend emailed me a link to a cheesy scones recipe from The Guardian. I was hooked immediately. Cheese? Bread? As the great Amy Poehler says, Yes Please! Sure, everything was in grams, this being a British website, but the internet could fix that for me, right? Cut to last Sunday and suffering a math headache as I tried to figure out just how much 450 grams of flour was in cups, and I don’t own a scale (by the way, a math headache is a special kind of pain you get when forced to do math when there are a million other things you’d rather be doing. I imagine people who don’t like to write have an equivalent reaction, a splitting headache when forced to draft a report when they’d rather be fiddling with numbers).

img_2594I’m sure I could have gritted my teeth and figured it out, but it seemed easier to just find a different recipe. I found my way to Mastering the Art of Baking, a book that’s been a touchstone for me lately in, well, mastering the art. One catch: It called for self-rising flour, of which we had none. Thomas suggested looking up a different recipe that used all-purpose flour, which we always have on hand, but this particular recipe looked too good to pass up. Why surrender my fate to the interwebs when I had a perfectly good recipe? So I walked to and from the grocery store, in the rain, to get a bag of self-rising flour (it’s only about 15 minutes each way, but don’t tell anybody).

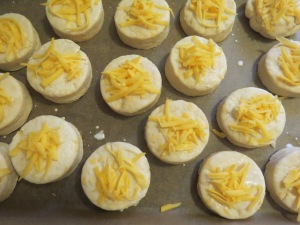
img_2604Luckily, the rainy walk was worth it. A combination of self-rising flour, baking powder, and high heat causes these scones to puff up impressively; unlike other baked goods, they do not expand outward, only upward. Even after a day in a Tupperware, they still tasted fresh-baked, soft and flaky, not a hint of dryness. And of course cheese, blended into the scones and sprinkled on top, makes everything better. I brought these to a Halloween party at work, and they were a hit, even with the 11-month-old baby in attendance.

All scones offer infinite possibilities: Cut these in half and make a mini ham sandwich; serve them alongside tea; eat them for breakfast at the table or on the go; keep them on hand for a midday snack…and so much more. Inspired by the internet, made reality by a book, these scones are the perfect expression of being a home cook these days, drawing from the screen and the printed word. Philosophizing aside, and most importantly, they’re damn tasty.

Cheesy Scones
Adapted from Mastering the Art of Baking
Makes about 17 scones

5 cups self-rising flour
2 teaspoons baking powder
2 pinches of salt
9 tablespoons unsalted butter, cut into small chunks
1 ½ cups grated cheddar cheese
2 cups milk or heavy cream (or a combination), plus a little milk for brushing the scones

  1. Using a flour sifter or fine mesh strainer, sift the flour, baking powder, and salt into a large bowl. Use your fingers to rub in the chunks of butter until well combined. Stir in 1 cup of grated cheese.
  2. Make an indent in the center of the flour mixture. Pour 1 ¾ cup milk or cream into the indent. Use a butter knife to mix in the milk/cream, moving the knife through in a slicing motion, until a clumpy dough starts to form. Mix the dough with a large spoon or your hands, adding a little more milk as needed.
  3. Heat oven to 425 degrees. Line a baking sheet with parchment paper (or grease with butter). Place the dough on a lightly floured surface and roll it out to 1-inch thickness. Use a 2.5-inch circular cutter (or the ring from the lid of a Mason jar) to cut out dough circles and place them on the prepared baking sheet. (Don’t twist the cutter as you cut out the circles; the book says this causes uneven rising. Who knew?) Bring the dough together again and roll it out to 1-inch thickness, then cut out more circles. Repeat this process until all of the dough is used up. The scones can be close together on the baking sheet—they will rise up, not out.
  4. Brush each scone with a little milk. Sprinkle each scone with a generous pinch of the remaining grated cheese.
  5. Bake the scones for 12 minutes, or until they are lightly browned on top and sound hollow when tapped.


Back in the Kitchen: Sweet Potato Chili

A couple weeks ago, still recovering from the long flights home from South Africa (at least 22 hours in the air, plus more time on buses, trains, and going slightly delusional in the Dubai airport at 2 a.m.), I decided to get back into routine and cook. I didn’t order another round of takeout, as we did the night we got back.  Instead, I hauled my sleepy self into the kitchen to make sweet potato chili.

img_2360I wish this story were more inspiring—a home cook getting back into the kitchen after traveling to another country and eating different dishes, rejuvenated with new ideas and tastes. But the truth is, even though I wanted to cook, I also had a different opinion, voicing itself rather loudly, that peeling a yam and slicing an onion and getting everything ready was just too much work and, please, can I just sleep now? So while I managed to prep the vegetables and everything else, my thought process went like this: This probably won’t be that great, I’ll just make it, and that’ll be the end of that.

img_2370Sometimes it’s a great thing to be wrong. From the first bite of chili, I could hardly believe how sublime it was. It’s flavored just strongly enough with chili powder, with the sweetness of the yams adding a contrast not usually found in most chili recipes. There’s something luxurious about the texture; this one’s smoother, more subtle than other chilis. When you’re putting it together, it might seem like it needs more vegetables, or something else to fill it up, but trust me, it needs nothing else.

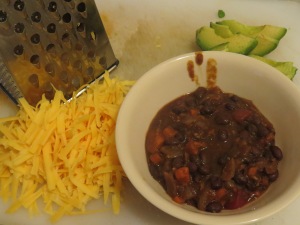
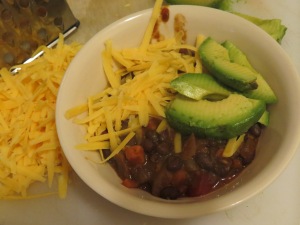
img_2373Except toppings, of course. We ate the chili with a lid of grated cheddar on top of each serving and sliced avocado on top of that. As usual, this combination didn’t disappoint. When I make this again, I’d love to serve it with buttermilk biscuits, cornbread, or challah bread. On the night I first made this, just putting the chili together was all I could do, but I could see another time (when I’m not in the grasp of jet lag) when I could make biscuits while the chili simmers and does its flavor-melding magic.

I’m thankful I pushed myself to make this chili and that despite my low expectations, it turned out fabulously. There are nights when ordering takeout is necessary, and others where it’s worth it to do your own thing.

Sweet Potato Chili
Adapted from Modern Jewish Cooking

¼ cup olive oil
1 onion, finely diced
1 carrot, peeled and diced (optional)
1 large yam, peeled and cut into ½-inch pieces
1 tablespoon brown sugar
8 garlic cloves, peeled and minced
1 tablespoon plus 1 ½ teaspoons chili powder
1 ½ teaspoons ground cumin
1/8 teaspoon cayenne
1 14.5-ounce can diced tomatoes
2 tablespoons balsamic vinegar
2 15-ounce cans black beans, drained and rinsed
½ cup water
Toppings: Diced avocado, grated cheddar cheese

  1. Heat the olive oil in a large pot over medium heat. Add the onion, carrot, yam, and brown sugar, stirring to coat with the oil. Let cook for 8-12 minutes, until the vegetables are softened, stirring occasionally.
  2. Stir in the garlic, chili powder, cumin, and cayenne. Let cook for a minute or so, then stir in the tomatoes (with their juice), balsamic vinegar, black beans, and water.
  3. Bring chili to a boil, then reduce the heat to low. Partially cover the chili and let simmer 15-25 minutes, until the chili thickens, stirring occasionally.
  4. Serve chili with grated cheddar and diced avocado on the side for topping.

Tomatillo Treasure: Tacos with Salsa Verde

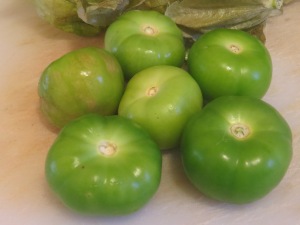
In the spirit of expanding my horizons and whatnot, I’ve lately experimented with ingredients I don’t use often. One of these was mascarpone cheese. Another was tomatillos, which resemble a green tomato and are wrapped in a papery husk oozing sticky sap. If you got past “sticky sap” and are still reading, congrats, because this unusual vegetable transforms into an excellent sauce.

IMG_8314Tomatillos are members of the nightshade family, and are a longtime feature of Mexican cuisine (a really long time—they were favored by the Mayans and Aztecs, or so Wikipedia tells me). I’d only used them once before, and it was to make these tacos in college. I didn’t use tomatillos again until just recently, and that’s a shame, because salsa verde—the most common use for tomatillos—deserves a place on tacos, burritos, nachos, chicken, and anything else you can think of that works.

IMG_8321I began by broiling the tomatillos, onion, bell pepper, and garlic. Broiling for more than a minute or two makes me nervous. When I think about it I picture a grilled cheese sandwich emerging from the oven blackened after an attempt to broil it. That image has come to represent all my broiling anxieties, which I had to set aside in order to make this meal. The promise of something delicious often wins over worries (not unfounded, mind you) about burning the food. Luckily, it all turned out fabulous: the tomatillos were pleasantly charred, the thin crescents of onion cooked to perfection.

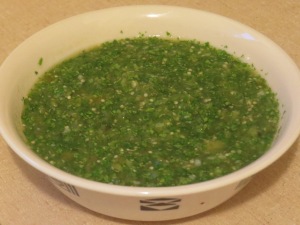
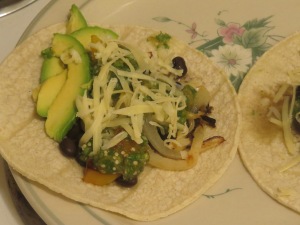
IMG_8337From there, the recipe was less stress-inducing. I blended the tomatillos with a generous bunch of cilantro leaves, which weave their distinctive flavor throughout the sauce. It’s vibrant, as bright and pleasant as new spring leaves. Served on top of beans, cheese, and roasted pepper and onion, the sauce elevates this meal to something beyond—and better than—a regular weeknight taco. (Full disclosure: I added more cheese to my tacos after taking these pictures.)

Tomatillos may not look like much, tucked away in the produce section (well, that’s how it is at our local grocery), covered in muted green husks that belie their ability to transform into a versatile sauce. Once you discover them, I think you’ll see why they have such staying power.

Tacos with Salsa Verde

Olive oil for greasing the baking sheet
¾ pound tomatillos (about 6), husks removed
3 garlic cloves, peeled
1 onion, sliced into crescent strips
1 bell pepper, sliced into strips
1 cup chopped cilantro leaves
1 15-ounce can black beans, drained and rinsed
Corn tortillas
1 avocado, sliced
1 cup (or more) grated white cheddar cheese

  1. Heat oven broiler. Lightly grease a baking sheet with olive oil. Spread whole tomatillos and garlic cloves and sliced onion and bell pepper on the baking sheet. Broil for 6 minutes. Remove from oven, stir vegetables, and return to oven to broil 6 minutes more. The tomatillos should be charred in places and the onion and pepper should be soft and browned in some places.
  2. Place cilantro leaves and roasted tomatillos and garlic in a food processor and pulse until a smooth sauce forms.
  3. In a small saucepan, heat the beans over low heat. Heat the corn tortillas in the microwave or in the oven on low heat.
  4. To assemble the tacos, place a couple small spoonfuls of black beans on a corn tortilla. Top with a couple bell pepper strips and onion slices. Top with a tablespoon or so of the salsa verde, avocado slices, and cheese. Repeat until the fillings and sauce are used up.

For Your Next Party (or Dinner), Layered Bean Dip

Here’s something I’m sure a few of us could agree is awesome: party food that’s unfussy, easy to put together, and totally delicious. This bean dip belongs in that category and is one of those appetizers that will probably save you more than once from a pre-party lack of inspiration.

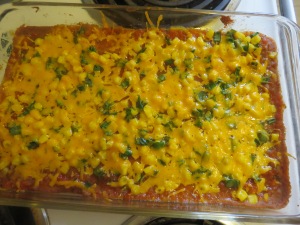
IMG_7846While I’m sure bean dip comes in other forms, the one I enjoy most is the layered kind, in which beans, cheese, salsa, and other additions are spread one on top of the other in a deep baking dish. This way, you’re pretty much guaranteed to get a bite of everything with every chip you dip. This one starts with a layer of refried beans mixed with lime juice and cumin. This dip doesn’t shy away from lime flavor, and you will taste it in every bite.

IMG_7857Next comes the salsa. Choose your favorite salsa—any kind will do. I like something more akin to pico de gallo, with a little spice. Maybe you prefer a chunkier salsa or even, if you’re lucky enough, something homemade (my family used to have salsa-making parties which have sadly fallen out of fashion, but oh, the memories!). This is topped by corn and chopped green onions, followed by cheese and, after baking in the oven, sour cream. While I had to use frozen corn this time, I can imagine it will be even better in the summer with kernels fresh off the cob.

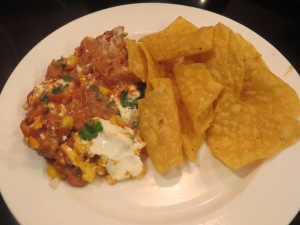
IMG_7906Which brings me to an important point: Although I made this dip for a Super Bowl party, it’s not tied to a particular event or holiday (to some people in my family, the Super Bowl is both). This dip will be at home on many tables, whether it’s at a Memorial Day barbecue, a Fourth of July party, or an impromptu get-together. I can vouch for its travel-ability, after taking it by bus, ferry, and car to my parents’ house for the party, though you should put it in a cooler if you’re taking it very far.

Truthfully, I’m not going to wait until the next get-together to make this. I’m already planning to use it to fill burritos. There’s no need to wait for a special event for this dip—Monday night dinner will do nicely.

Layered Bean Dip
Adapted from Cooking Light

A little olive oil, for greasing the pan
2 teaspoons lime juice
½ teaspoon cumin
1 16-ounce can refried beans
1 cup prepared salsa
2/3 cup thawed frozen corn or fresh cooked corn kernels
¼ cup diced green onions
¾ cup grated cheddar cheese
¾ cup sour cream
2 tablespoons chopped fresh cilantro (or more, to taste)

  1. Heat oven to 350 degrees. Coat the inside of an 11 x 7-inch baking dish with olive oil. In a medium-sized bowl, combine the lime juice, cumin, and refried beans. Evenly spread this mixture in the prepared baking dish.
  2. Spread the salsa evenly over the bean mixture. Top this with the corn and green onions, followed by the cheddar cheese.
  3. Bake the dip for 20 minutes. Remove from the oven and let stand for 10 minutes.
  4. Evenly spread the sour cream on top of the dip. Sprinkle chopped cilantro on top.

Potato and Kale Quiche, with a Wonderful Way to Cook Potatoes

One of the best ways to tell someone you love them is to cook them a meal. A big breakfast, a midnight snack—the particulars don’t matter as much as the thought behind the meal. A quiche is one of the most efficient ways to do that; you can fit a lot of your loved ones’ favorite foods into one dish that’s appropriate to serve from breakfast to dinner (or the aforementioned midnight snack).

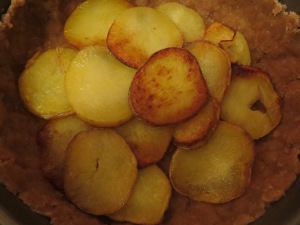
IMG_2235Having already professed my love of quiche twice on this blog, I don’t need to tell you again how amazing it is, but I do think this iteration is the best so far. The reason is mainly the potatoes, and the technique Thomas has perfected: slicing the potatoes very thin, tossing them in olive oil, and roasting them until they are browned and crisped in places. This has become the epitome of potato goodness, at least in our apartment.

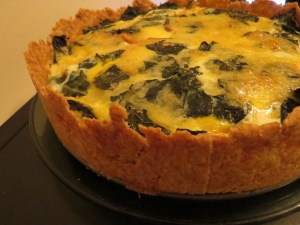
IMG_2241The way these thinly sliced potatoes are layered in the quiche is much like a traditional potato tarte tatine, but with eggs, kale, and cheese mixed in to make a proper quiche. I start by layering half the potatoes in the crust, and topping that with sautéed kale and grated white cheddar. To ensure that the egg gets around all of the potatoes, I next pour half of the beaten eggs on top before starting the second layer.

IMG_2262The layering makes for a tasty quiche that also looks appealing on the plate. Since it’s holiday time, you might find yourself hosting a get-together or needing to bring something to one, and quiche is easy to share among a crowd. If this is not a holiday time for you (or you just don’t go for that kind of thing), quiche is primed for a casual breakfast or dinner, and the leftovers make lunch the next day something to look forward to.  If you can’t get as far as making the whole quiche, at least try the potatoes; serve them alongside a roast turkey or tossed with winter greens.

I enjoy making this quiche any time there’s a surplus of eggs, a need for leftovers for lunches, or just when I feel like making something that will make myself and Thomas (and anyone else lucky enough to be there) happy. Not a bad way to show you care.

Potato and Kale Quiche

3 Yukon gold potatoes, sliced into thin circles
¼ cup olive oil, plus a little more for greasing the pie dish and cooking the kale
1 cup all-purpose flour
1 cup whole wheat flour
½ cup vegetable oil
1 bunch kale (preferably the flat, not curly, leaf variety), stems discarded, leaves coarsely chopped
2 cups grated white cheddar cheese
8 eggs, beaten

  1. Heat oven to 400 degrees. Place the potato slices in a large bowl and toss with ¼ cup olive oil until evenly coated. Spread potato slices on a baking sheet, making sure that none overlap. Bake potato slices for 15 minutes. Using a spatula, flip the slices. Bake for 10 minutes.
  2. While the potatoes bake, make the crust. Use olive oil to lightly grease a 9” diameter pie dish or springform pan. In a large bowl, combine the all-purpose and whole wheat flours. Add the vegetable oil a little at a time, stirring after each addition. Pea-sized balls of dough should form. Once you’ve added all of the vegetable oil, stir in water 1 tablespoon at a time until everything sticks together. Shape the dough into a loose ball and place it in the prepared pie dish. Flatten and shape the dough to form the quiche crust. Use a fork to poke a scattering of tiny holes in the bottom of the crust.
  3. Heat a little olive oil over medium low heat in a small skillet. Add the kale leaves to the skillet and let cook, stirring occasionally, until just a bit wilted. Remove from heat.
  4. Reduce oven heat to 375 degrees. Arrange half of the potato slices in the prepared quiche crust. (The potatoes can overlap) Top potatoes with half of the kale. Top the kale with 1 cup of grated cheddar. Pour half of the beaten eggs on top. Repeat with remaining potatoes, kale, cheese, and eggs. Gently press down on the top of the quiche so all ingredients, including the cheese, are submerged in the eggs.
  5. Bake the quiche at 375 degrees for 40 minutes, or until eggs are set.

A Bellingham inspiration: Yam enchiladas

Nostalgia is a funny thing. Out of the blue, I was dreaming of Boundary Bay’s yam enchiladas (AleChiladas, to be exact), which are acclaimed in many circles, including on this blog. Since a trip up to Bellingham was not in the works, I decided to make my own version of yam enchiladas.

089The first try was a total flop (and is not pictured). It wasn’t all my fault; the tortillas we used were stale, and cracked when we rolled them. The filling was just plain yams, and while yams taste wonderful, they needed something else. Plus there wasn’t enough sauce. The meal wasn’t inedible, and we ate it all, but I knew it wasn’t worthy of this blog. So I started searching. I dove into my collection of cooking magazines because, even though there are gazillions of enchilada recipes on the internet, I never turn down an excuse to flip through my collection.

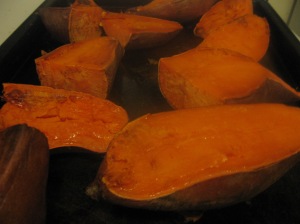
098This recipe is from Cooking Light, which is just the place I would expect to find such a simple classic (people try to make enchiladas fancy and highbrow, but I know I love the messy, minimal version). It called for chicken, but I replaced the chicken with mashed yams. I began by baking the yams until they were ultra-soft and slightly browned. Then I scooped the yams out of their skins and into a bowl for mashing. Meanwhile, the sauce, a mixture of onion, broth, tomato sauce, black beans, and various spices, including chili powder and cayenne, simmered on the stove.

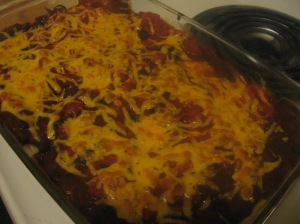
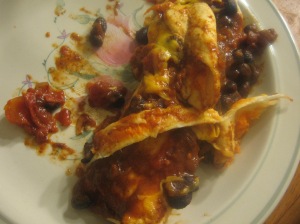
113I distributed some of the sauce among the tortillas, so they were filled with more than just yams. I poured the rest (and there was plenty) on top of the rolled-up tortillas in the baking dish. The finishing touch: plenty of shredded cheddar and chopped canned tomatoes (I’ll use fresh in the summer). Next, you might expect that I baked it, but no: I broiled the enchiladas, a much speedier process by far. Thank goodness for Cooking Light.

This enchilada recipe, as Thomas said, is “a keeper.” I agree. It’s not quite the yam enchiladas at Boundary Bay, but it’s something special of its own. Hopefully I’ll look back on these times with a smile, as I do now when I think of gathering with friends at Boundary Bay and many times spent enjoying the meals there.

Yam Enchiladas
Adapted from Cooking Light (and inspired by Boundary Bay Brewery)

2 large yams, each cut in half lengthwise
1 cup diced white onion
1 cup chicken or vegetable broth
1 tablespoon all-purpose flour
1 ½ tablespoons chili powder
2 teaspoons ground cumin
¾ teaspoon garlic powder
½ teaspoon ground cayenne pepper
1 15-ounce can tomato sauce (not red sauce for pasta, but a smooth puree)
1 15-ounce can black beans, drained and rinsed
10 6-inch white flour or whole wheat tortillas
1 cup grated cheddar cheese
1 15-ounce can diced tomatoes, drained well

  1. Heat oven to 350 degrees. Place the yams cut side down on a lightly oiled baking sheet. Bake for 60 minutes, or until each yam is easily pierced with a fork. Allow the yams to cool enough to hold, then use a spoon to scoop the yams away from the skins, into a bowl. Using a potato masher, mash the yams until they are smooth.
  2. In a deep skillet or saucepan, whisk together the onion, broth, flour, chili powder, cumin, garlic powder, cayenne, and tomato sauce. Bring to a boil, then reduce heat to medium. Let simmer for 2 minutes, stirring often (the sauce will thicken a bit during this time). Stir in beans; let cook for 2 minutes.
  3. Preheat oven broiler. Heat the tortillas in the microwave for 2 minutes (or more, if needed). Lightly oil a large, deep baking dish. Spread a hefty spoonful of mashed yams on a tortilla; top with a small spoonful of the onion/bean mixture. Roll up the tortilla as tight as you can, and place in prepared baking dish, seam side down. Repeat with remaining tortillas and mashed yams (there will be lots of sauce left over).
  4. Pour the remaining sauce evenly over the rolled-up tortillas in the dish. Top with grated cheddar and diced tomatoes.
  5. Broil enchiladas for 3 minutes, or until the cheese is lightly browned and bubbling.